Noir tutorial - part 1
Background
Clojure web stack consists of Ring, which is the base HTTP library akin to Python's WSGI and Ruby's Rack. On top of Ring lives Compojure, which provides some basic routing, and that in turn is leveraged by Noir to provide a simple framework for developing websites. Here's we'll see how to use Noir to build a basic website.
Setting Up a Noir Project With Leiningen
The easiest way to get Noir setup is to use Leiningen 2, which has become the de facto build tool for Clojure. Once you have Leiningen installed, you can simply do the following to get a template site created:
lein new noir my-website
cd my-website
Alternatively, if you're using Counterclockwise with Eclipse, then all you need to do is make a new Leiningen project and put noir in the "Leiningen Template to use:" field.
Project Structure
The template site will have the following structure:
/my-website
  project.clj
  --src/
     --my_website/
       server.clj
       --models/
       --views/common.clj
               welcome.clj
  --test/my_website
  --resources/public/
                  --css/reset.css
                  --img/
                  --js/
The skeleton application contains a few files in it. The project.clj file is used for building the application and managing dependencies by Leiningen. Under the src folder, we have the folder called my_website which contains server.clj. This file contains the entry point to our application. It loads up all the views and provides a main function which can be used to start the application.
The models folder is used to keep the data layer of the application, such as code for the database access and table management. The views folder contains the namespaces describing the pages of our application and their supporting code. The template contains common.clj which provides a basic layout and any code shared between the pages. The welcome.clj is the namespace where an example page is defined.
Dependency Management
Let's first look at the project.clj file:
(defproject my-site "0.1.0-SNAPSHOT"
            :description "FIXME: write this!"
            :dependencies [[org.clojure/clojure "1.4.0"]
                           [noir "1.3.0-beta3"]]
            :main my-site.server)
The file is fairly self explanatory, and currently only contains dependencies for Clojure and Noir.
Running the Project in Development Mode
At this point we should be able to start up our website:
lein run

Starting server...
2012-08-16 09:39:22.479:INFO::Logging to STDERR via org.mortbay.log.StdErrLog
Server started on port [8080].
You can view the site at http://localhost:8080
#<Server Server@2206270b>
2012-08-16 09:39:22.480:INFO::jetty-6.1.25
2012-08-16 09:39:22.521:INFO::Started SocketConnector@0.0.0.0:8080
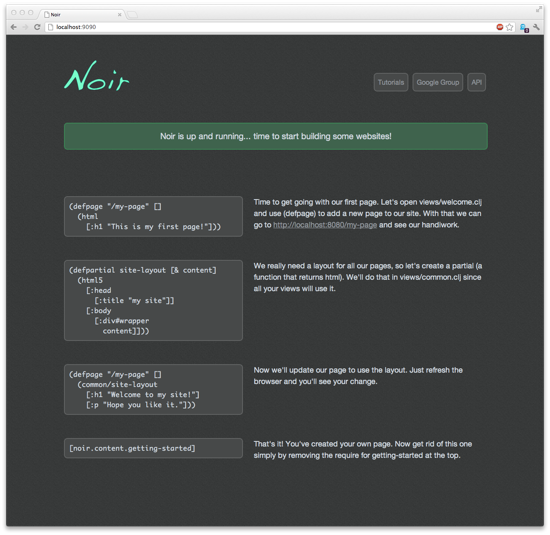
Let's point the browser to localhost:8080 and make sure everything is working as expected. We should be greeted with a Noir help page since we haven't defined one for "/" route yet. At this point we can start editing our pages and any changes we make should be reflected immediately.

Creating Pages
Noir provides two primary way to manipulate pages. One useful macro is defpartial which simply wraps the body in html function from Hiccup, which will generate the resulting HTML string from our content:
(defpartial foo [content]
  [:p content])

(foo "some stuff")
"<p>some stuff</p>"
The other is defpage, this macro will create a Compojure route for the specified URL. It has the following syntax:
(defpage url params content)
By default defpage is expected to return an HTML string. How that string is generated is up to you. In this tutorial we'll be using Hiccup, but you could just as easily use something like Enlive to create your templates using actual HTML. Noir itself is completely agnostic in this regard.
Now, let's look at the parameters that defpage accepts. First we have a URL which supports the following formats:
- a simple string such as
"/welcome" - a RESTful path such as
"/welcome/:user"where the key:userwill be appended to the params map with the value provided when the URL is accessed - a vector specifying the request type which the page responds too :
[:post "/welcome"]
Next, we have params, which is simply a map of keywords and their associated values generated from the request parameters. Any keys from the URL will also appear in this map:
(defpage "/welcome/:user" {:keys [user]}
  (html [:html [:body "hello " user]]))
Finally, we add the actual page content to be rendered. As I mentioned above the result must be a string, so generally we'll wrap the contents of each page in (common/layout ...) which was provided by the template. The official documentation for defpage with lots of other examples and details is available here.
Handling Form Input
When making pages with forms the general pattern is to create a defpage for the GET request which will contain the UI, and another for POST which contains the server component. To test that out, let's change welcome.clj to look like the following:
(ns my-website.views.welcome
  (:require [my-website.views.common :as common]
            [noir.content.getting-started])
  (:use [noir.core :only [defpage]]
        hiccup.core hiccup.form))

(defpage "/welcome" {:keys [greeting]}
  (common/layout
    (if greeting [:h2 greeting])
    (form-to [:post "/welcome"]
      (label "name" "name")
      (text-field "name")
      (submit-button "submit"))))

(defpage [:post "/welcome"] {:keys [name]}
  (noir.core/render "/welcome"
    {:greeting (str "Welcome " name)}))
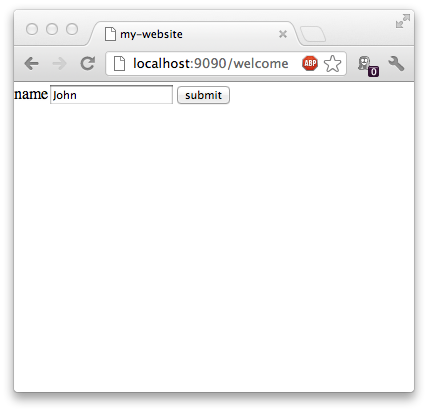
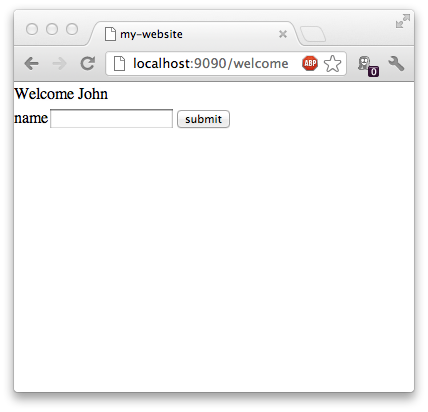
As can be seen above, the page which responds to GET creates a form and submits it to its POST counterpart. It in turn generates a greeting and renders the page with it. Note that the names for fields used in the form get translated into keys in the params map when we submit it.

before submit

and after submit
This covers the basic model for creating pages and interacting with them. Now, let's look at how we can package our website into a standalone application.
Packaging and Running Standalone
To package our project we need to change our server to compile into a class, we can do this by simply adding gen-class to its namespace like so:
(ns my-website.server
  (:require [noir.server :as server])
  (:gen-class))
Now we can build and run our project:
lein uberjar
java -jar my-website-0.1.0-SNAPSHOT-standalone.jar

Starting server...
2012-08-16 20:12:47.846:INFO::Logging to STDERR via org.mortbay.log.StdErrLog
2012-08-16 20:12:47.846:INFO::jetty-6.1.x
2012-08-16 20:12:47.882:INFO::Started SocketConnector@0.0.0.0:8080
Server started on port [8080].
You can view the site at http://localhost:8080
Summary
To recap, in this section of the tutorial we learned the following:
- how to create a new Noir project
- manage dependencies
- create pages
- handle submits from forms
- create a standalone instance of our application
Next time we'll look at how to do session management and database access.
The source for the tutorial is available here.