Noir tutorial - part 2
This is the second part of the Noir tutorial, where we'll continue to cover the basics of building a website. In the comments for part 1, somebody suggested that Noir might be abandoned. This is absolutely not the case, I've contacted Chris Granger and this is what he has to say:
Hey Dmitri,
Light Table actually uses Noir, so it's certainly still alive. I'm not the primary one driving things day to day right now, Raynes has been helping out with that.
Cheers,
Chris.
Hopefully, this should put any fears regarding the health of the project to rest. And with that out of the way, lets continue building our site. In the previous section of the tutorial we setup a basic project and learned how to add pages to it. This time let's look at how to persist data to a database, create sessions, and do some basic user management.
Database Access
There are several Clojure libraries for dealing with relational databases, such as SQLKorma, ClojureQL, Lobos, and [clojure.data.jdbc])(http://clojure.github.com/java.jdbc/doc/clojure/java/jdbc/UsingSQL.html). In this tutorial we'll be using clojure.data.jdbc to keep things simple, but I do encourage you to take a look at the others.
Setting up the DB connection
First, we'll need to define our database connection, this can be done by either providing a map of connection parameters:
(def db {:subprotocol "postgresql"
         :subname "//localhost/my_website"
         :user "admin"
         :password "admin"})
by specifying the JNDI name for a connection managed by the application server:
(def db {:name "jdbc/myDatasource"})
I personally like this option, because it completely separates the code in the application from the environment. For example, if you have dev/staging/production servers, you can point the JNDI connection to their respective databases, and when you deploy your application it will pick it up from the environment.
Finally, you can provide a JDBC data source, which you configure manually:
(def db
  {:datasource
    (doto (new PGPoolingDataSource)
     (.setServerName   "localhost")
     (.setDatabaseName "my_website")
     (.setUser         "admin")
     (.setPassword     "admin")
     (.setMaxConnections 10))})
At this point you should setup a database and create a schema for this tutorial called my_website. I will be using PostgreSQL so if you use a different DB there might be slight syntactic differences in your SQL. Once you have the DB up and running, we'll need to add the clojure.data.jdbc and JDBC driver dependencies to project.clj:
(defproject my-website "0.1.0-SNAPSHOT"
  :description ""my Noir website""
  :dependencies [[org.clojure/clojure "1.4.0"]
                 [noir "1.3.0-beta3"]
                 [org.clojure/java.jdbc "0.2.3"]
                 [postgresql/postgresql "9.1-901.jdbc4"]]
  :main my-website.server)
Using to the Database
Next, let's create a new namespace called my-website.models.db in the models directory of our project, and open it up. Here we'll first need to add a require statement for clojure.data.jdbc:
(ns my-website.models.db
  (:require [clojure.java.jdbc :as sql]))
now let's create a connection:
(def db
  {:subprotocol "postgresql"
   :subname "//localhost/my_website"
   :user "admin"
   :password "admin"})
we'll add the following function which will allow us to create the users table:
(defn init-db []
  (try
  (sql/with-connection
    db
    (sql/create-table
      :users
      [:id "SERIAL"]
      [:handle "varchar(100)"]
      [:pass   "varchar(100)"]))
  (catch Exception ex
    (.getMessage (.getNextException ex)))))
Here's you'll notice that the create-table needs to be wrapped in a with-connection statement which ensures that the connection is cleaned up correctly after we're done with it. The only other thing to note is the use of "SERIAL" for the id field in the table, which is PostgreSQL specific way to create auto incrementing fields. It's also possible to use keywords such as :int, :boolean, and :timestamp for field types as well as the corresponding SQL string as is done in the above example. The whole statement is wrapped in a try block, so if we get any errors when it runs we'll print the error message.
In the REPL we'll run:
(init-db)
If your DB is configured correctly, then you should now have a users table. We'll now write a function to add a user to it:
(defn add-user [user]
  (sql/with-connection
    db
    (sql/insert-record :users user)))
now test that the function works correctly:
(add-user {:handle "foo" :pass "bar"})
=>{:pass "bar", :handle "foo", :id 1}
finally we'll need a way to read the records from the database, I wrote the following helper function to do that:
(defn db-read [query & args]
  (sql/with-connection
    db
    (sql/with-query-results
      res
      (vec (cons query args)) (doall res))))
the function accepts an SQL string and optional parameters:
(db-read "select * from users")
({:pass "bar", :handle "foo", :id 1})

(db-read "select * from users where id=?" 1)
({:pass "bar", :handle "foo", :id 1})
we'll write another helper function to fetch the user by handle
(defn get-user [handle]
  (first
    (db-read "select * from users where handle=?" handle)))
at this point we've got a user table and helper functions to create and query users. Let's hook that up to our pages and provide the functionality to create user accounts and allow users to login.
Creating a Registration Page
Noir provides a very simple way to manage sessions using noir.ession namespace. Let's update our site to allow a user to create an account. First we'll create a new namespace called my-website.views.users and add the following code to it:
(ns my-website.views.users
  (:use [noir.core]
        hiccup.core hiccup.form)
  (:require [my-website.views.common :as common]
            [my-website.models.db :as db]
            [noir.util.crypt :as crypt]
            [noir.session :as session]
            [noir.response :as resp]))

(defpage "/signup" {:keys [handle error]}
  (common/layout
    [:div.error error]
    (form-to [:post "/signup"]
             (label "user-id" "user id")
             (text-field "handle" handle)
             [:br]
             (label "pass" "password")
             (password-field "pass")
             [:br]
             (submit-button "create account"))))

(defpage [:post "/signup"] user
  (try
    (db/add-user (update-in user [:pass] crypt/encrypt))
    (resp/redirect "/")
    (catch Exception ex
      (render "/signup" (assoc user :error (.getMessage ex))))))
You'll notice that we've required a few new namespaces which we'll be using shortly. Otherwise, we see a similar setup to what we did in the first part of the tutorial, except when we accept the post from the form, we actually add the user to the database.
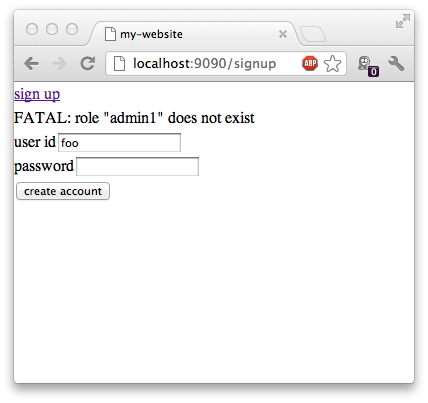
We will encrypt the user password using noir.util.crypt and then attempt to store the user in the database. If we fail to add the user we'll render our signup page again, but this time with an error message.

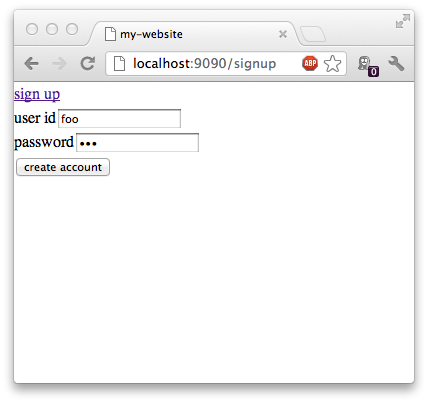
create user page

error displayed when user creation fails
Session Management
At this point we need to provide the users with the ability to login with their accounts. Let's go to the common namespace and add a way for users to login. We'll need to add noir.session to our :require statement:
(ns my-website.views.common
  ...
  (:require [noir.session :as session])
then we'll go back to users namespace and create a page to handle logins:
(defpage [:post "/login"] {:keys [handle pass]}
  (render "/"
          (let [user (db/get-user handle)]
            (if (and user (crypt/compare pass (:pass user)))
              (session/put! :user handle)
              {:handle handle :error "login failed"}))))
We'll use noir.crypt to validate the password against the one we have in the database, and if the password matches we'll stick the user handle into the session. The syntax for updating the session is fairly straightforward, and the documentation page explains it well. We'll be using get, put!, and clear! functions, notice that put! and clear! have an exclamation mark at the end indicating that they mutate the data in place.
The users will also need a way to logout, so let's add a page to handle that as well:
(defpage [:post "/logout"] []
  (session/clear!)
  (resp/redirect "/"))
When the user logs out, we'll simply clear the session and send them back to the homepage. We will now go to our common namespace and add the noir.session and hiccup.form in our namespace:
(ns my-website.views.common
  (:use [noir.core :only [defpartial]]
        hiccup.element
        hiccup.form
        [hiccup.page :only [include-css html5]])
  (:require [noir.session :as session]))
then add a helper function to create the login form:
(defn login-form []
  (form-to [:post "/login"]
           (text-field {:placeholder "user id"} "handle")
           (password-field {:placeholder "password"} "pass")
           (submit-button "login")))
and finally add it to our layout:
(defpartial layout [& content]
            (html5
              [:head
               [:title "my-website"]
               (include-css "/css/reset.css")]
              [:body
               (if-let [user (session/get :user)]
                  [:h2 "welcome " user
                    (form-to [:post "/logout"] (submit-button "logout"))]
                  [:div.login
                   (login-form) [:p "or"] (link-to "/signup" "sign up")])

               content]))
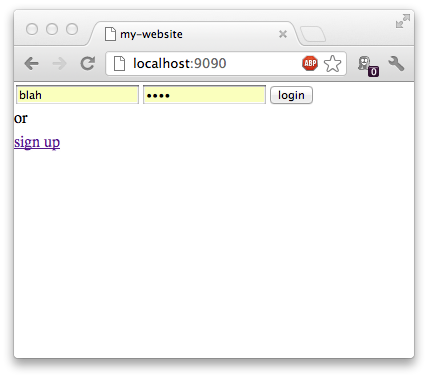
At this point our main page should look like the following:

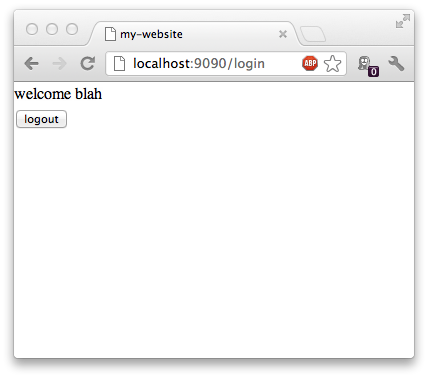
and after we sign up and login, we should see:

The logout button should take us back to the login page by clearing the user session. We now have a complete website with some basic user management, the only thing left to add is actual content. :)
Summary
In this section we learned the following:
- how to setup the database and do basic queries
- do basic authentication using
noir.crypt - use sessions to store user information
Hopefully this is enough to get you started using Noir and making your sites with it. If I omitted anything important let me know in comments and I'll be glad to go over it.
The complete source for this part of the tutorial is available here. Also, for an example of a complete real world site you can see the source for this blog here.
In the next section we'll talk about setting content types and doing file uploads and downloads.