Configuring Atom for Luminus
There are many editors and IDEs available for Clojure today. The most popular ones are Emacs with CIDER and IntelliJ with Cursive. While both of these options provide excellent development environments, they also require a bit of learning to become productive in.
Good news is that you don't have to learn a complex environment to get started. This post will walk you through the steps of configuring Atom editor editor to work with a Luminus project. We'll see how to configure Atom for editing Clojure code and how to connect it to the remote REPL started by the Luminus app for interactive development.
Prerequisites
You'll need the following installed to follow along with this post:
Configuring Atom
Let's take a look at the bare minimum Atom configuration for working with Clojure. Once you're up and running, you may with to look here for a more advanced configuration. We'll start by installing the following packages:
- parinfer or lisp-paredit package for structural editing
- proto-repl to connect to a Clojure REPL
Structural Editing
A structural editor understands the structure of Clojure code and provides shortcuts for manipulating s-expressions instead of lines of text. It also eliminates the need to manually balance the parens. This takes a bit of getting used to, but it will make working with Clojure a lot more pleasant in the long run.
Parinfer
The parinfer mode will attempt to automatically infer the necessary parens based on the indentation. This mode has a gentle learning curve and attempts to get our of your way as much as possible. You can read more about how it works here.
Paredit
The paredit mode takes a bit more getting used to, but provides you with precise control over code structure. Whenever you add a peren, a matching closing paren will be inserted automatically. Paredit will also prevent you you from deleting parens unless you have an empty pair.
The package also provides a handy ctrl-w shortcut that will extend the selection by s-expression. This is the recommended way to select code as you don't have to manually match the start and end of an expression when selecting.
The REPL
The REPL is an essential tool for working with Clojure. When integrated with the editor, it allows running any code that you write directly in the application.
Connecting the REPL
We'll create a new Luminus project with SQLite database support by running the following command:
lein new luminus myapp +sqliteOnce the project is created, we can go to the project folder and run the migrations:
cd myapp
lein run migrate
lein runThe app will start the nREPL server on localhost:7000 once it loads. Let's open the project in Atom and connect to the nREPL instance.
The default keybinding for connecting to the nREPL is ctrl-alt-, y on Windows/Linux and cmd-alt-, y on OS X. This should pop up a dialog asking for the host and the port.

Enter 7000 as the port and hit enter. If everything went well the REPL should now be connected to your project.
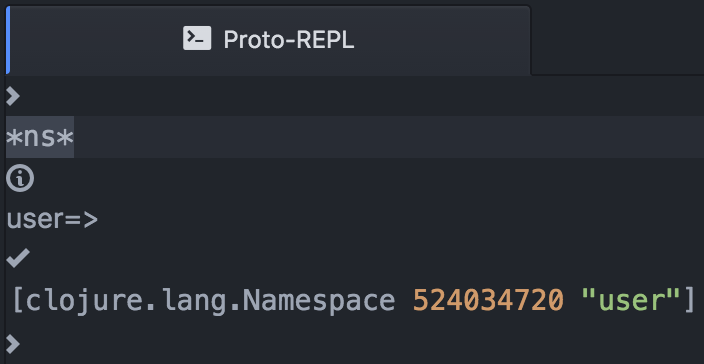
Once the REPL is connected we can try to evaluate some code in it. For example, let's check what namespace we're currently in by typing *ns* in the REPL and then hitting shift-enter. The result should look something like the following:

Let's navigate to the myapp.routes.home namespace and try to run some of the database query functions from there. We'll first need to require the database namespace:
(ns myapp.routes.home
  (:require [myapp.layout :as layout]
            [compojure.core :refer [defroutes GET]]
            [ring.util.http-response :as response]
            [clojure.java.io :as io]
            ;; add a reference to the db namespace
            [myapp.db.core :as db]))
Once we've done that, we'll need to reload myapp.routes.home namespace. To do that we'll need to send the code from the editor to the REPL for evaluation.
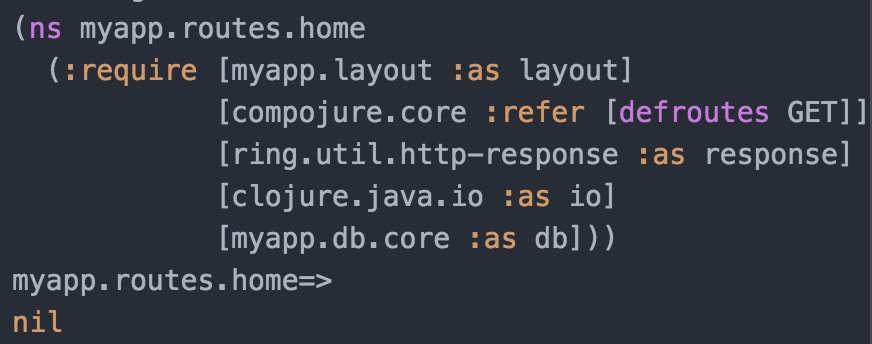
There are a few commands for doing this. I recommend starting by using the ctrl-alt-, B shortcut that sends the top-level block of code to the REPL for execution. Place the cursor inside the ns declaration and hit ctrl-alt-, B to send it to the REPL. We can see that the REPL displays the code that was sent to it along with the result:

Now that we have the db namespace required, we can start the database connection state by typing the following command in the REPL:
(mount.core/start #'db/*db*)
The result should look as follows:

With the database is started, let's add a user to it by running the following code in the REPL:
(db/create-user!
 {:id "foo"
  :first_name "Bob"
  :last_name "Bobberton"
  :email "bob@foo.bar"
  :pass "secret"})
We can also test that the user was added successfully by running:
(db/get-user {:id "foo"})
We can see that the user record exists in the database:
{:id "foo"
 :admin nil
 :is_active nil
 :last_login nil
 :first_name "Bob"
 :last_name "Bobberton"
 :email "bob@foo.bar"
 :pass "secret"}
As you can see, the code that we run in the REPL executes in the context of the application and has access to all the resources and the application state. Let's take a closer look at how this helps us during development.
You might have noticed that the records we get back from the database use the _ character as word separator. Meanwhile, idiomatic Clojure code uses the - character. Let's write a couple of functions to transform the key names in the results.
A Clojure map represents its entities as vectors containing key-value pairs. We'll start by writing a function to rename underscores to dashes in map entries:
(defn clojurize [[k v]]
  [(-> k name (.replaceAll "_" "-") keyword) v])
We'll load the function in the namespace by placing the cursor anywhere inside it and hitting ctrl-alt-, B to load it. Let's run this function in the REPL to see that it works:
(clojurize [:first_name "Bob"])
=>[:first-name "Bob"]
We can see that the result is what we expect. Next, let's write a function to rename the keys in a map:
(defn clojurize-keys [m]
  (->> m (map clojurize) (into {})))
We'll load the new function and test that this works as expected in the REPL:
(clojurize-keys (db/get-user {:id "foo"}))
We see that the result is the translated map that we want:
{:id "foo"
 :admin nil
 :is-active nil
 :last-login nil
 :first-name "Bob"
 :last-name "Bobberton"
 :email "bob@foo.bar"
 :pass "secret"}
Now that we have a nicely formatted result, let's add a route to query it in the browser:
(defroutes home-routes
  (GET "/" [] (home-page))
  (GET "/user/:id" [id]
       (-> (db/get-user {:id id})
           (clojurize-keys)
           (response/ok)))
  (GET "/about" [] (about-page)))
We can now navigate to http://localhost:3000/user/foo and see the user data.
Conclusion
That's all there is to it. While this setup is fairly minimal, it will let you play with a lot of Clojure features without having to spend practically any time learning and configuring an editor.