Edge-Aware Pixelation for Better Pixel Art
Pixelation is everywhere these days, from retro game aesthetics to modern design trends. But if you've ever tried to create pixel art from a photograph, you've probably noticed that the results often look a bit off. Edges get jagged, important features get distorted, and the whole image tends to lose its character.
Most pixelation algorithms rely on the same approach of downscaling the image, then upscaling it back. While this is fast and cheap to implement, it treats every part of the image the same way forcing a rigid grid that cuts indiscriminately across edges, faces, and fine details.
In this post, we'll take a look at a strategy of using edge-aware pixelation. The idea here is to use an algorithm that adapts to the structure of the image rather than forcing a uniform grid onto it. We'll look at how it works, why it tends to produce better results, and the trade-offs involved.
The Traditional Approach
Let's start by looking at what most pixelation libraries do under the hood. The most common approach uses standard image scaling with smoothing.
// Pseudo-code for traditional pixelation
const downscaled = scaleDown(image, pixelSize); // Uses bilinear/bicubic
const pixelated = scaleUp(downscaled, originalSize); // Nearest-neighbor
While this works, there are a few obvious problems. Smoothing filters tend to blur important edges before downsampling, and the pixel grid doesn't care about the image content. This often leads to artifacts where edges get "chopped" across pixel boundaries, creating jagged lines. You also end up losing fine features like eyes or text.
Some approaches try to improve on this using median color sampling instead of averaging.
// Sample colors in each block, pick median
const blockColor = median(colorsInBlock);
This avoids some of the blurring, but it still suffers from the same fixed grid issue. It ignores the image structure and can create harsh transitions between blocks.
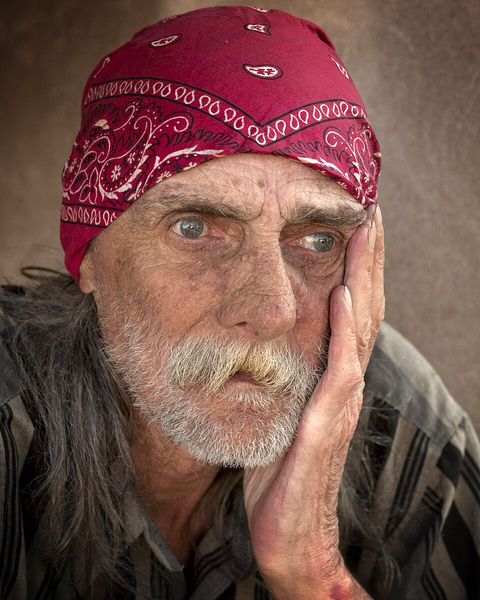
Basically, all these methods force a uniform grid onto the image without considering its content. The result is usually pixel blocks that cut across important features. For example, if we use the following image from wikimedia as the input.
The result ends up looking something like the following when using a naive pixelation algorithm:
![]()
Edge-Aware Adaptive Grid
Instead of forcing a rigid grid, we can let the grid adapt to the image. This is the core idea behind edge-aware pixelation. We can treat pixelation as an optimization problem with four main stages.
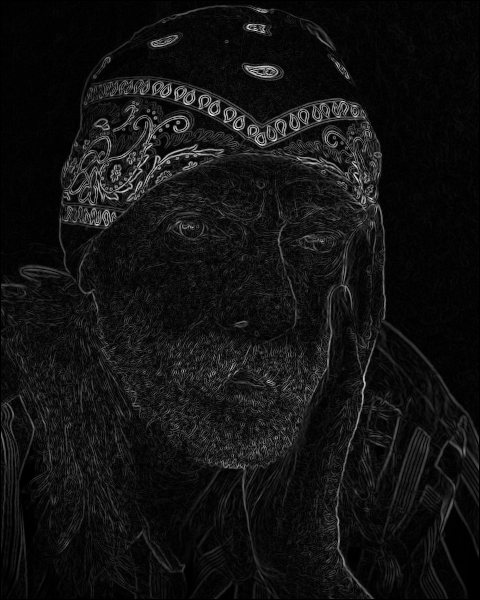
1. Edge Detection
First, we need to understand where the important features are in the image.
// Sobel operators detect gradient magnitude and direction
const gradient = calculateGradient(image);
const edges = applyNonMaximumSuppression(gradient);
const edgeMap = thresholdEdges(edges, sharpness);
We use Sobel operators to compute the gradient magnitude, and then apply non-maximum suppression to thin the edges to a single-pixel width. Finally, we use percentile-based thresholding to adapt to the edge distribution of the specific image. Since this can be computationally expensive, using WebGL can provide a significant speedup here.
This gives us an edge map where bright pixels represent edges and dark pixels represent smooth regions.
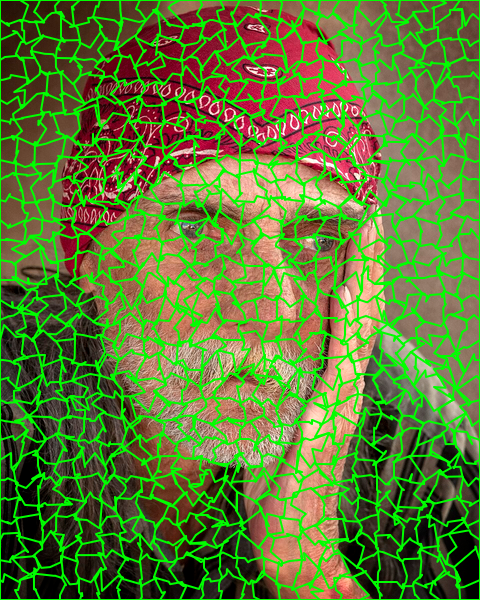
2. Grid Initialization
Next, we start with a regular grid matching the target pixel size.
const grid = createUniformGrid(width, height, pixelSize);
Unlike traditional methods, the grid is just a starting point. Each cell is defined by four corner points which we can move around.

3. Grid Optimization
This is where the actual work happens. We iteratively move the grid corners to align the cell boundaries with the detected edges.
for (let iteration = 0; iteration < numIterations; iteration++) {
  for (each corner in grid) {
    // Search nearby positions
    const candidates = searchNeighborhood(corner, stepSize);

    // Evaluate how well each position aligns edges
    for (const candidate of candidates) {
      const score = evaluateEdgeAlignment(candidate, edgeMap);
      if (score > bestScore) {
        bestPosition = candidate;
      }
    }

    // Move corner toward best position (with damping)
    corner.moveToward(bestPosition, damping);
  }
}
For each corner, we test multiple positions in a local neighborhood and evaluate the alignment by sampling edge strength along the grid edges. We want to find positions where the grid boundaries follow the edges continuously. We also use damping to prevent over-optimization and maintain stability.
The result is a grid that bends and adapts to align with the natural structure of the image.
4. Color Assignment
Finally, we need to assign colors to our optimized cells.
for (each cell in grid) {
  const pixels = samplePixelsInCell(cell);

  // Blend between average (soft) and median (crisp) based on edge presence
  if (cell.hasEdges) {
    color = blend(average(pixels), median(pixels), sharpness);
  } else {
    color = average(pixels); // Smooth regions use average
  }

  renderCell(cell, color);
}
Here we can use a blending strategy. For smooth regions, we use the average color for natural blending. For edge regions, we can blend between average and median based on the desired sharpness. This lets us tune the aesthetic from soft, blended edges to crisp, high-contrast ones. Looking at the two methods side by side, we can see how much smoother the resulting image is:
| Edge detection | Naive |
|---|---|
Discussion
There are several advantages to this approach. The most obvious is edge preservation. Traditional methods create jagged artifacts because pixel boundaries cut across edges. By aligning the grid boundaries with the edges, we can preserve continuity and create smoother transitions.
This also means we don't get those choppy edges on outlines, and we can preserve fine details like facial features or text much better. The algorithm effectively has some semantic awareness of what's important in the image.
However, there are trade-offs to consider. The adaptive grid and color blending can produce softer edges compared to traditional methods. If you're looking for extremely crisp, high-contrast pixel art with hard edges, like what you'd see in retro games, traditional downsampling might actually be a better fit.
You also get less contrast in some cases. The color blending can reduce the overall "punchiness" compared to median sampling.
Performance is another factor. Edge-aware pixelation is computationally more intensive. You have to handle edge detection, iterative grid optimization, and spatial hashing for rendering. While WebGL optimizations make it practical taking 100-500ms on most images, simple downsampling will always be faster.
I've found that edge-aware pixelation works best for photographs, portraits, and complex scenes where preserving structure is important. It's less ideal for abstract art or images where a uniform grid is desired for stylistic reasons.
Conclusion
By detecting edges and optimizing alignment, edge-aware pixelation produces pixel art that does a good job of preserving the essence of the original while still achieving low-resolution aesthetic.
If you're interested in trying this out live here, and all the code is available as an open source library called Pixel Mosaic that implements both traditional and edge-aware pixelation.
I hope this gives you some ideas for your own image processing projects. Sometimes the simple method is enough, but for complex images, the extra effort of edge-aware processing can be well worth it.